| version 7.9.x | Download Pending |
Audience
This article is intended for PSIcapture Administrators.
Overview
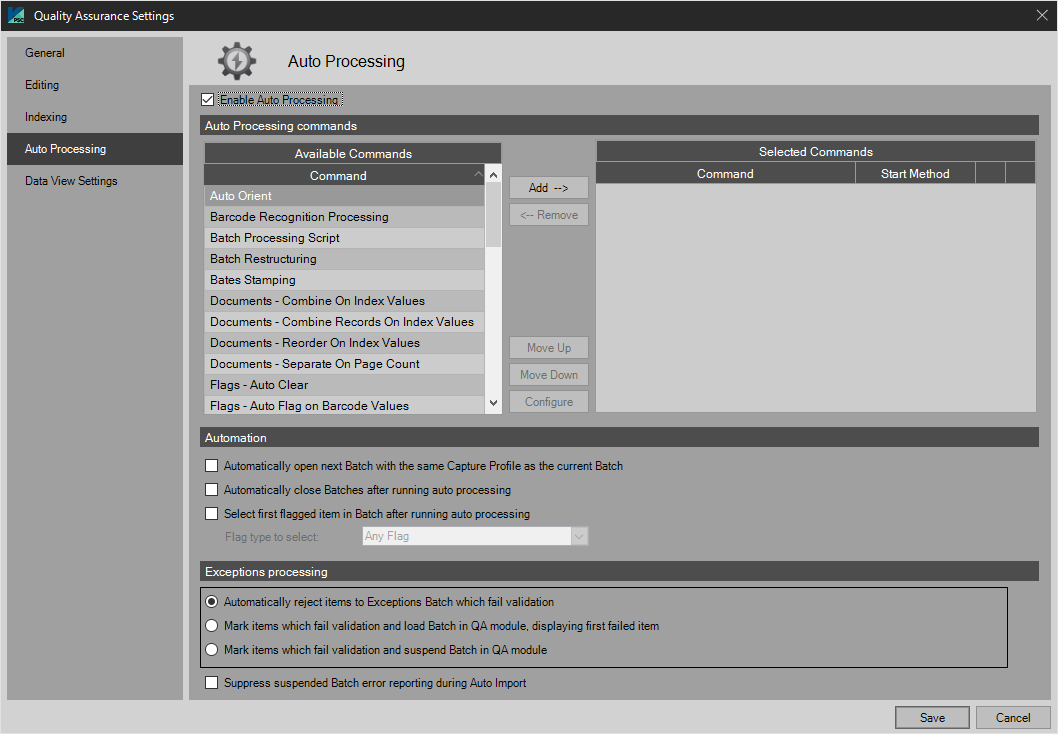
Auto Processing is used to adjust different aspects of a page or document. For example users can adjust orientation, flagging, or redaction. To enable this check the Enable Auto Processing box and choose which aspects to change. NOTE: Enabling this feature will allow the QA module to be added to Auto Import and Auto Processing Capture Profiles as well as standard queue base Capture Profiles.
Available Auto QA Commands
Add one or more of the available commands by highlighting those desired and selecting Add. NOTE: The Selected Auto QA Commands will be run in the order listed. Correct placement is critical in order to get the desired results. Example: Reordering would usually occur before combine and combine before separation by number of pages.
Auto Orient
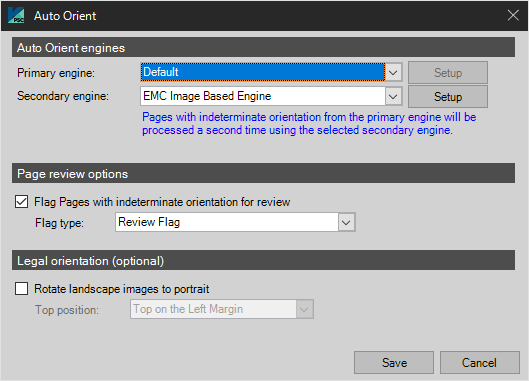
Auto Orient is the setting that allows users to set whether a page is automatically adjusted as portrait or landscape during the QA process.
The following options are available for page orientation:
- Auto Orient Engines - Choose which engine to use as primary and/or secondary for auto orientation.
- Primary Engine - This will be the engine that the program will use first. If anything besides Default is chosen the Secondary Engine is disabled.
- Default
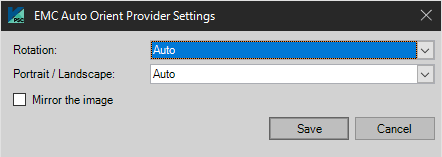
- EMC Auto Orient Provider Settings
- Deprecated Settings (Recostar OCR Based Engine)
- OmniPage OCR Based Engine
- Secondary Engine - This is the backup option if there was a problem processing with the Primary Engine and only available if the Default option is chosen on the Primary Engine.
- Primary Engine - This will be the engine that the program will use first. If anything besides Default is chosen the Secondary Engine is disabled.
- Page Review Options
- Flag Pages with indeterminate orientation for review - When this feature is enabled and PSIcapture cannot determine the page orientation, the page will be flagged with the flag type set blow.
- Flag type: Set the flag type to be assigned when a page is flagged with indeterminate orientation.
- Legal orientation (optional)
- Select either Top on the Left Margin or Top on the Right Margin to determine which margin will set the top of the page when viewing a non-rotated version of the scanned legal page.
Barcode Recognition Processing
This feature is available in versions 7.7 and above.
NOTE: While running this command, settings from the Recognition page of the Capture Profile will be used. You must enable Barcode processing in that location.
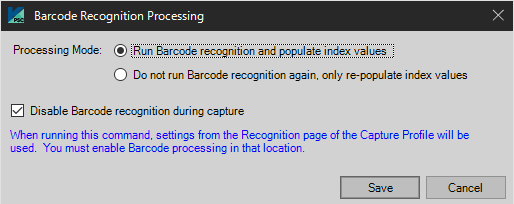
The Barcode Recognition Processing feature allows barcode processing to occur during the QA Auto Processing Workflow step, or choose a different behavior.
Run Barcode recognition and populate index values - Enable this feature to run Barcode recognition during the QA Auto Processing workflow step, and then populate the corresponding index field values as configured in the capture profile.
Do not run Barcode recognition again, only re-populate index values - Enable this feature to disable Barcode recognition during the QA Auto Processing workflow step, only re-populating the corresponding index field values as configured in the capture profile as they are recognized during previous workflow steps.
Disable Barcode recognition during capture - Enable this feature to turn off barcode recognition during the Capture/Import workflow step, or while capturing new content in a QA workflow step with this feature enabled.
Batch Processing Script
This feature is available in versions 6.1 and above.

The Batch Processing Script is called once for the batch. Use this scripting hook to perform data-related operations across the entire batch after indexing is complete.
Press the Edit Batch Processing Script button to open the script editor. Once you script is complete and built, press Save to save the script. Press Cancel to abandon your changes.
Batch Restructuring
The Batch Restructuring script will be called for each page in the batch. Use it to analyze each page and set the action to take on that page.

The following page actions are available:
- No Action - Do nothing with this page
- New Document - Start a new document with this page, making it the first page in the document
- Append Document - Append the document containing this page to the previous document
- New Folder - Start a new folder with the document containing this page.
- New Folder and Document - Start a new folder with this page, making it the first page in a new document in the new folder.
- Drop Page - Remove this page from the batch.
Bates Stamping
This allows Bates Stamping to be run in QA. For more information on how to setup Bates Stamps check out PSIcapture Administrator Guide: Bates Stamping.
Documents
Combine on Index Values
Choose the document Fields To Match that the program will combine together in the batch. NOTE: In the example below: if the Doc Classification and Loan Number match the program will combine them. It will also Sequence them based on the data in the "Page" index field and Validate on the "Number of Pages" index field.
Example: The Sample Data would look like this after the above configuration is run if all 5 documents were present.
Fields: Doc Classification, Loan Number, Number of Pages, Page
Document: 1 Legal,12345,5,1(pages 1-5 would be combined into 1 multi-page tiff)
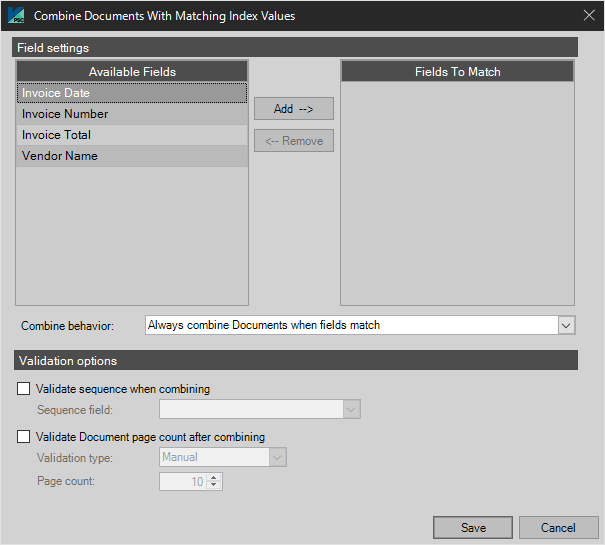
- Combine Behavior - Choose what behavior to use when combining documents.
-
Always Combine Folders when Fields Match
-
Don't Combine Folder when any Match Field is Blank
-
Don't Combine Folder when all Match Fields are Blank
-
- Validate Sequence when Combining - Select the Sequence Field (this field will be to validate all intended documents are present before the combine.
Example: If the data below represents the documents available in a batch, a Sequence error would occur as page 2 is missing.- Fields: Doc Classification, Loan Number, Number of Pages, Page
- Document: 1 Legal,12345,5,1
- Document: 3 Legal,12345,5,3
- Document: 4 Legal,12345,5,4
- Document: 5 Legal,12345,5,5
- Validate Document Page Count After Combining Select Validation Type: then Select Index Field and choose the Page Count Field. (field containing the number of pages expected in this document) or Select Manual and choose the Page Count (fixed number of pages expected in each document)
Example: If the Sample Data looks like this after the above configuration is run, a validation error would occur because of a page count error (page 5 is missing)- Fields: Doc Classification, Loan Number, Number of Pages, Page
- Document: 1 Legal,12345,5,1
- Document: 2 Legal,12345,5,2
- Document: 3 Legal,12345,5,3
- Document: 4 Legal,12345,5,4
Combine Records on Index Values
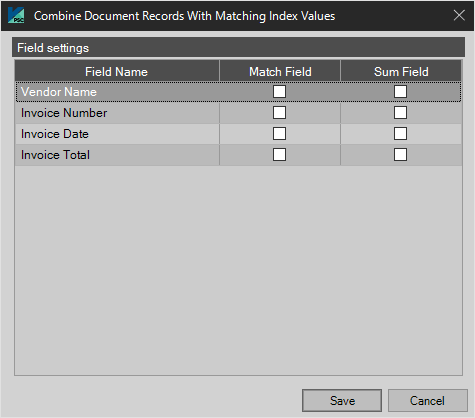
Select wither Match Field or Sum field to determine how to combine records on selected Index Values.
Reorder on Index Values
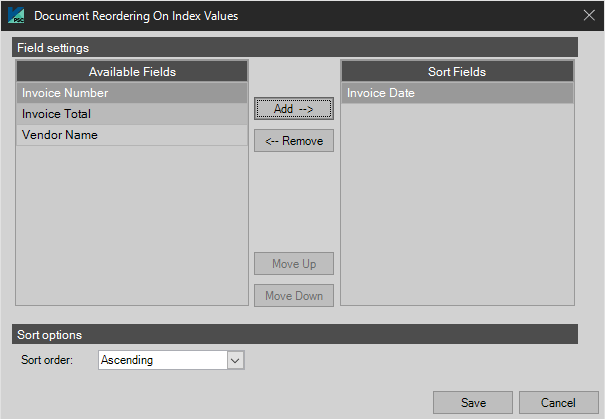
Users can reorder the pages of a batch by any index field defined in Capture Profile - Index Data Fields. Sort options are also available by ascending or descending order.
Separate on Page Count
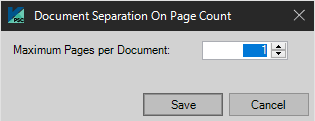
Set the Maximum Pages per Document, this causes a split of documents larger than this number of pages. NOTE: the user may also wish to enable Copy Index values when splitting Documents/Folders in Capture Profile - Advanced.
Flags
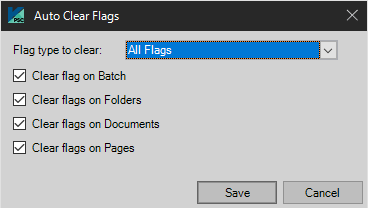
Flags - Auto Clear
In this window users can determine which flags to clear and on which batch items.
| Flag type to clear options: | Batch Items options: |
|---|---|
|
|
Flags - Auto Flag on Barcode Values
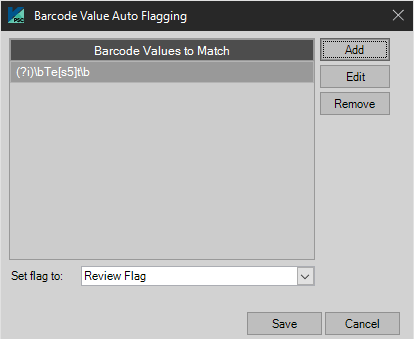
Automatically flag images based on barcode values. Select the desired flag and add any matching barcode values to be flagged.
Flags - Auto Flag on File Size
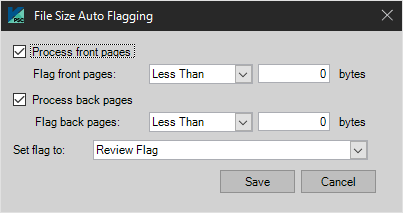
Automatically flag images based on the file size in bytes. Unique values can be entered for front pages and back pages.
NOTE: Users can individually enable and disable processing on Front Pages and Back Pages.
Flags - Auto Flag on Image Color Level
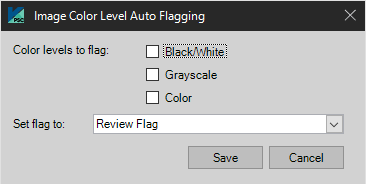
Automatically flag images based on color level, from Black/White to Grayscale and Color. Then, determine a matching flag type.
Flags - Auto Flag on Image Size
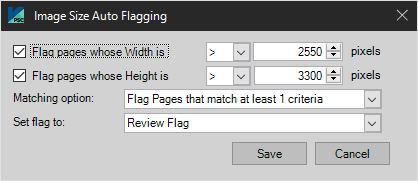
Specify the image size in pixels which will be flagged, and check the box next to width or height to include this parameter. Then create a matching option for either one of the above selected "Width" or "Height" options. Finally, specify the flag type to set.
Flags - Auto Flag on Index Values

Specify an index field and corresponding Regex to determine the criteria for flagging. Then, set the match type and flag type correspondingly. Check the boxes for "Flag Documents" and "Flag Folders" depending on your specific needs.
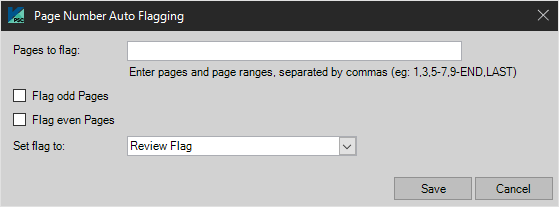
Flags - Auto Flag on Page Number
Automatically flag images based on page number. Enter the desired pages (separate multiple pages using comas) and select the flag type to apply.
Flags - Auto Flag on Page Type
Automatically flag pages based on various definitions including:
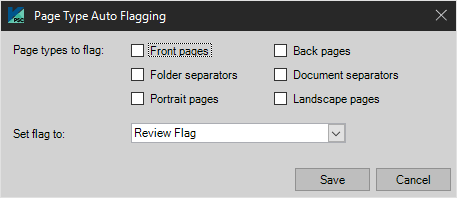
- Page Types to Flag
- Front Pages
- Back Pages
- Folder Separators
- Document Separators
- Portrait Pages
- Landscape Pages
- Set Flag to - Choose what flag the page should receive during processing.
Flags - Auto Process
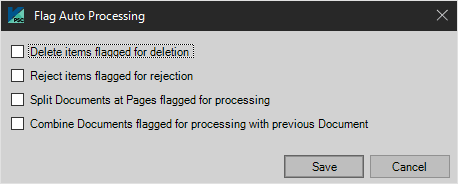
- Delete items flagged for deletion - All items with this flag will be automatically deleted.
- Reject items flagged for rejection - All items with this flag will be rejected to a new batch.
- Split Documents at Pages flagged for processing - When a document is flagged with the "Process Flag" flag type, PSIcapture splits these pages from the original pages of the document.
- Combine Documents flagged for processing with previous Document - When a document is flagged with the "Process Flag" flag type, PSIcapture combines these pages with the other pages of the batch.
Folders
Combine on Index Values
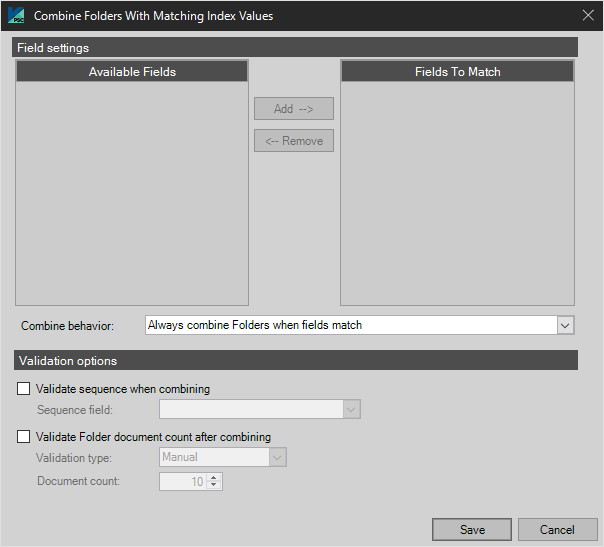
Choose the folder Fields To Match that the program will combine together in the batch. Specify the "Combine behavior" as suits your specific needs.
Choose Validation options based on your specific needs.
Separation On Document Count
Set the Maximum Documents per Folder, this causes a split of folders larger than this number of pages.
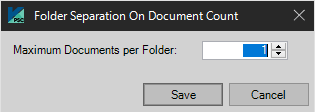
NOTE: the user may also wish to enable Copy Index values when splitting Document/Folders in Capture Profile - Advanced.
Separation On Index Values
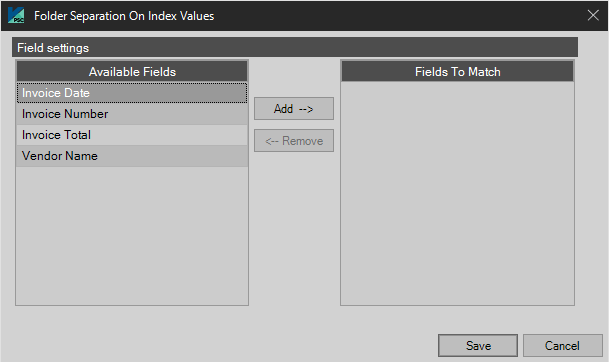
Select the Field To Match to separate folders on.
Image Processing
See Image Processing Options for detailed information.
Pages - Insert/Replace Pages
Users can use this feature to insert or replace pages that are flagged. This can allow users to insert pages that were previously captured or replace pages that are not correct or relevant with new ones. The options are defined below.

Insert/Replace Flagged Pages
- Process to Run - Decide what method to use
- Insert Pages before flagged Pages
- Insert Pages after flagged Pages
- Replace flagged Pages
- Flag to Process - Decide which flag to use as a marker. All flag options are available.
- Pages to Insert - Enter pages and page ranges, separated by commas (e.g. 1, 3, 5-7, 9-END, LAST)
Process Page inserts for all Records in the Document - The above Page Insert options will apply for all records in a multi-record document.
Image Source Options
- Image Source - This is where users choose where the pages come from. It can come from one of two places:
- Selected image path - Here users can browse the local computer files to locate the pages that will be inserted or replacement pages.
- Index field containing image path - Here users can choose an image path that is in an index field of a capture page. This will be the page or pages that will be inserted or replacement pages that will be inserted.
Redaction
Auto Redaction Using Zone OCR
Zone OCR can be utilized to block out certain data from the images.
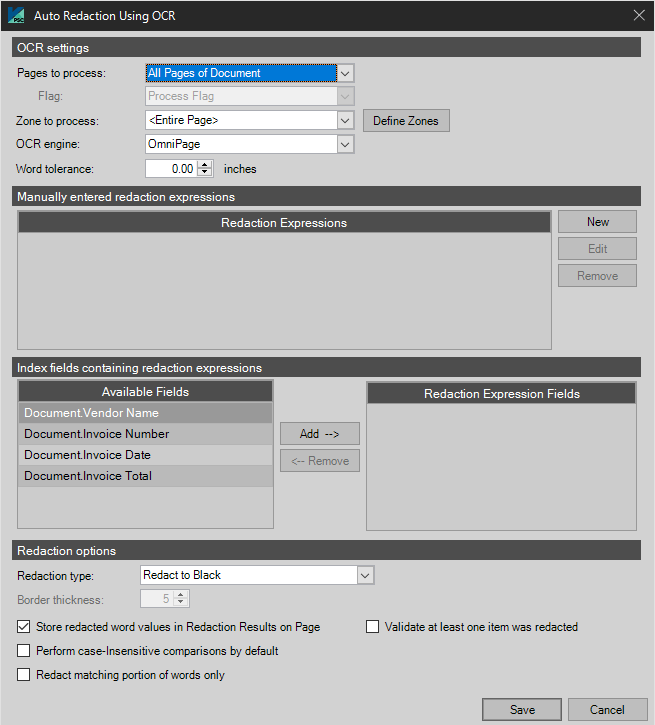
OCR Settings
- Pages to Process - Select which page to redact:
-
First Page of Document Only
-
Last Page of Document Only
-
All Pages of Document
-
Custom Page List of Document - Enter within “Custom Pages” field specific page numbers for OCR and redaction to process. Separate multiple pages by comma.
-
Separators Only - Enable Document/Folder separators in their corresponding check boxes.
-
Flagged Items Only
-
All Except Flagged Items
-
-
Flag - Choose a flag for processing.
-
Zone to Process - Default is the entire page, or click Define Zones to draw a custom zone. See Define Zones for additional information.
- OCR Engine
- OmniPage - Use the OmniPage OCR engine for recognition.
- Deprecated Settings (RecoStar OCR Engine) - Use the deprecated RecoStar OCR engine for recognition.
-
Word Tolerance - Allows users to define the distance the OCR engine will search when locating individual word breaks.
Example: “Invoice Number: 12345” – By default this appears to be 3 words. If users increase word tolerance the engine will recognize this example as a single word for the purposes of running pattern matching, highlighting, and other features that rely on word breaks.
Redaction Expressions
Use Regular Expressions to identify the data to be redacted. The expression shown in the sample below will redact Social Security Numbers. User can add more expressions via the Regular Expressions Editor by clicking Add.

Index Fields containing Redaction Expressions
This will allow users to redact words found within the specified index fields. Any matching words found within the search area will be redacted.
Redaction Options
- Redaction Type - Choose what type of redaction is needed.
- Redact to Black
- Redact to White
- Redact to White with Black Border
- Border Thickness - Specify in pixels how thick to make the border.
- Store Redacted Word Values in Redaction Results - Redacted words will be stored in the page information display if this option is checked.
- Perform Case-Insensitive Comparisons by Default - PSIcapture will compare the Redacted Expressions list with case-insensitive counterparts by default.
- Redact Matching Portion of Words Only - When checked, only the matching text will be redacted, not the entire word/words.
- Validate at least one item was redacted - Batch will fail validation if no redactions are performed.
Auto Redaction Using Zones
PSIcapture allows redactions performed in QA Auto Processing to use Index Values as anchor points. This allows a user to create dynamic redactions based on values found during indexing.
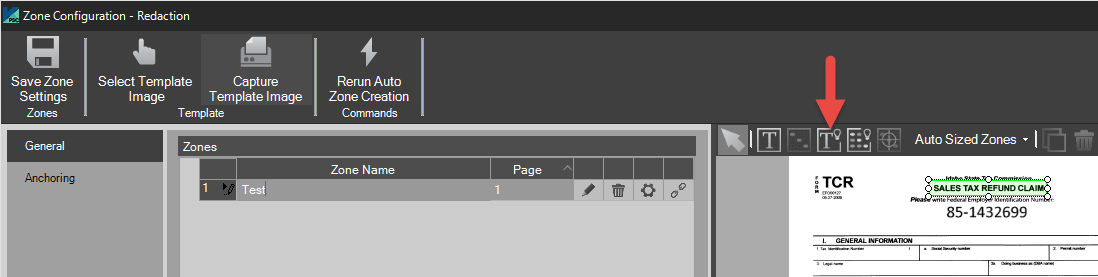
In the Quality Assurance settings select the Auto Processing tab. Chose "Redaction - Using OCR" and click "Add." Then, to begin defining zones for redaction, click "Define Zones."
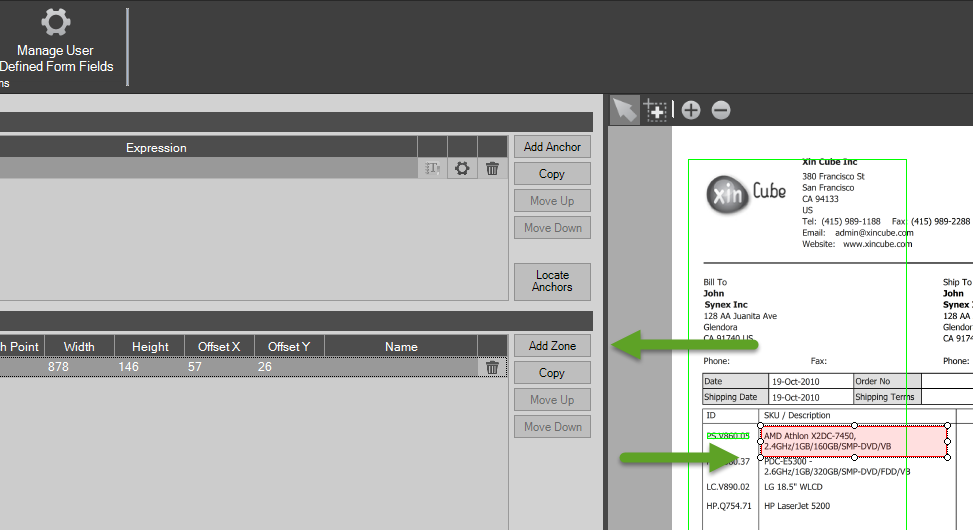
From there choose the button to draw an OCR smart zone.
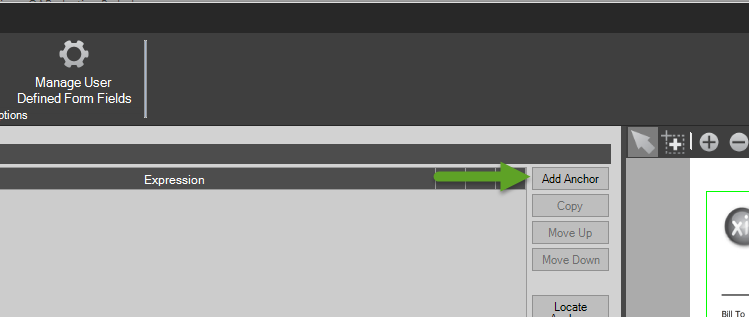
From the new "OCR Smart Zone Configuration" dialog, choose "Add Anchor."
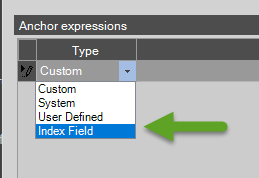
Change the type from "Custom" to "Index Field." Click the gear icon on the right side of the new line.
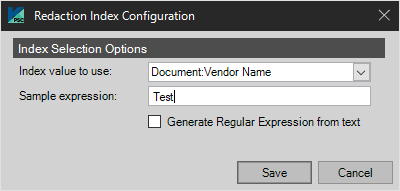
In the Redaction Index configuration chose an Index Value to base the redaction on. In order to configure the child zones you must supply a sample expression. This will be applied to the current Template Image. Choose "Generate Regular Expression from text" if you wish the index value found to be converted to a regular expression. This works exactly like the “Generate” button in the Regular Expression editor for “Custom” types and will use the same settings defined there. Those settings can also be managed from the “Regular Expression Builder Options” button in the OCR Smart Zone Configuration.
Click save and the anchor will be located with the sample text. If found it will be highlighted in green. The anchor expression will now show the type of index and it’s name. E.g. Document | ItemId. Click add a child zone to define the redaction area.
Setup of an Auto Redaction process via Index Field is complete. Explore Additional configuration options below, or explore the further sections detailing Auto Redaction methods via other extraction methods.
During Batch Execution
When QA auto processing is run, it will look in the specified area for the anchor. It will be looking for the current value of the specified index. If the RegEx option was selected it will convert that value to a RegEx exactly as it would be if you had typed it in the designer. If any values match the resulting expression, redaction will occur as specified in the child zone.
This feature can be utilized to block out certain areas from the image to hide confidential data.
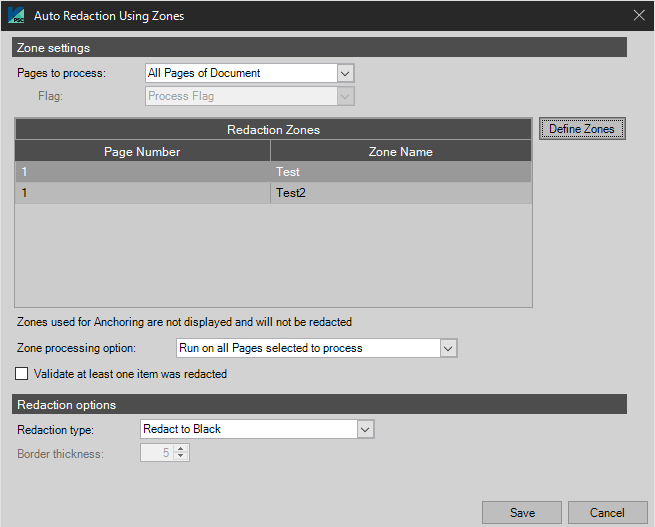
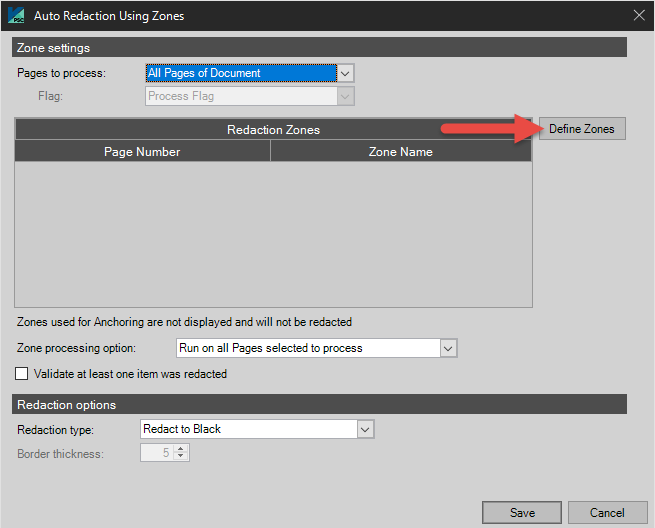
Zone Settings
- Pages To Process
-
First Page of Document Only
-
Last Page of Document Only
-
All Pages of Document
-
Custom Page List of Document - Enter within “Custom Pages” field specific page numbers for OCR and redaction to process. Separate multiple pages by comma.
-
Separators Only - Enable Document/Folder separators in their corresponding check boxes.
-
Flagged Items Only
-
All Except Flagged Items
-
- Flag - Choose a flag for processing.
Redaction Zones - Default is the entire page, or click Define Zones to draw a custom zone. See Define Zones for additional information. NOTE: Zones used for Anchoring are not displayed and will not be redacted.
- Zone Processing Option - Choose Run on Page defined in Zone Definition or Run on all Pages selected to process.
Redaction Options
- Redaction Type - Choose what type of redaction is needed.
- Redact to Black
- Redact to White
- Redact to White with Black Border
- Border Thickness - Specify in pixels how thick to make the border.
Run External Application
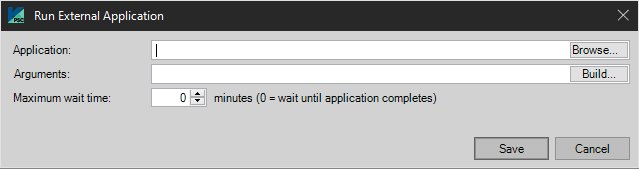
Application to Launch
Select the windows executable to launch.
Application Arguments
Supply any command line arguments, if any. These are supplied by the executable’ developer.
Maximum wait Time (in Minutes) - This specifies how long PSIcapture will wait for the given process above to complete before proceeding with the workflow.
Automation
Select Automatically open next Batch of this Document Type to process multiple queued batches of this type from the QA module.
Select Automatically close batches after running auto processing to close each batch after running the QA auto processing functions.

Exceptions Processing
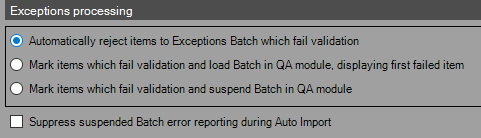
- Automatically Reject Items to Exceptions Batch which Fail Validation - Selecting this option will cause Folders and Documents that fail validation to be moved to an exceptions batch whose name will be the same as the original (Exception). Existing data will be saved and moved.
- Mark Items which Fail Validation and Load Batch in QA Module, Displaying First Failed Item - Selecting this option will cause all records that fail validation to be marked and the first record which fails validation to be loaded on the screen.
- Mark Items which Fail Validation and Suspend Batch in QA Module - Selecting this option will cause items which fail validation to be marked and if any did fail, once they are marked the batch will be suspended.
- Suppress suspended Batch error reporting during Auto Import - When this feature is enabled, batches that encounter an error while performing QA Auto Processing during Auto Import and Workflow Auto Processing will not display errors within the PSIcapture log.
Comments
Please sign in to leave a comment.