Introduction
This document will take you through the process of updating your PSIcapture Fusion 2 installation to PSIcapture Fusion 3. Since PSIcapture Fusion 3 works with HTML5 vs Microsoft Silverlight
there are some settings that users should ensure are enabled prior to using the installation file.
Installing on Windows Server 2012 R2
For installing on Windows Server 2012 R2 we have to enable some roles and features. In previous versions we ran aspnet_regiis in the cmd prompt instead.
In the server manager click "Add roles and features":

After selecting your server, in the Server Roles tab find and enable ASP.NET 4.5 as in the following screenshot:

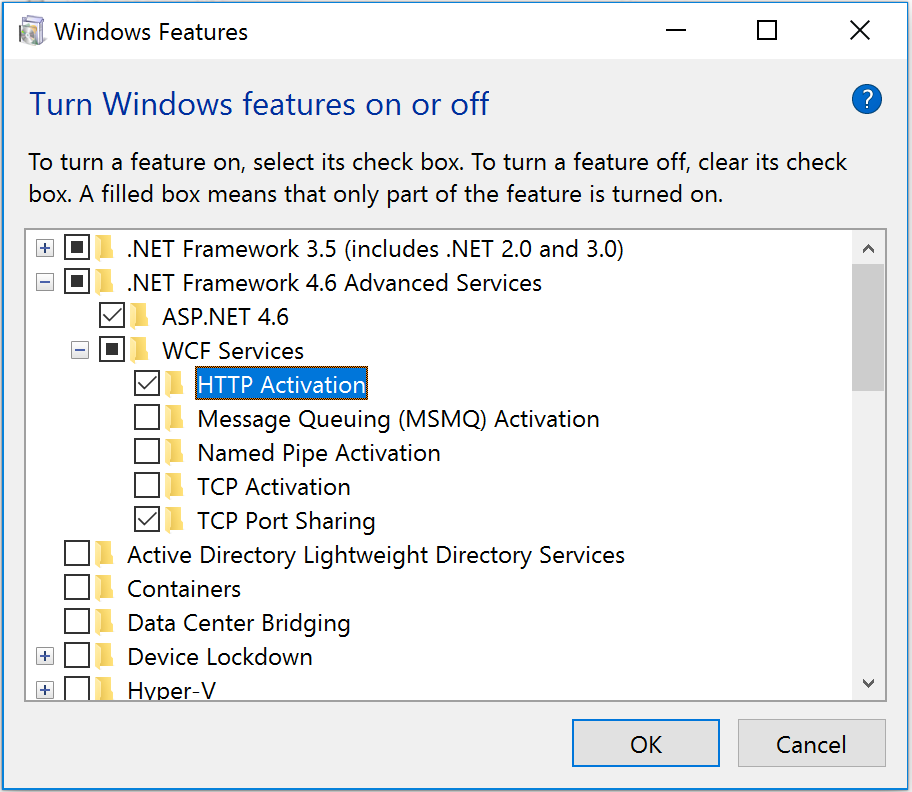
Also, in the Features tab enable HTTP Activation under WCF Services under .NET Framework 4.5 Features as in the following screenshot:

The webapp won't run properly without these roles and features enabled on Windows versions later than 2008.
Turning on Windows Features
The features mentioned above in “Installing on Windows Server” need to be on in Windows Features when installing PSIcapture Fusion locally on your computer. These settings can be found in the Control Panel under Programs and Features. Once the Program and Features window is open select the “Turn Windows Features On or Off” as shown below.

|
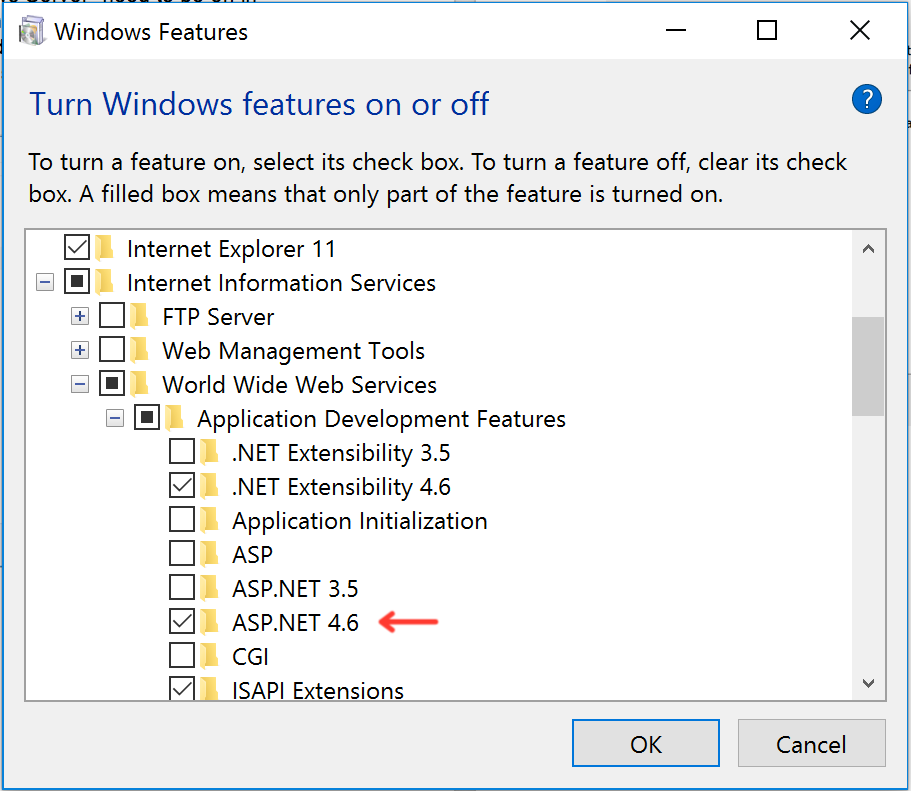
Make sure the “HTTP Activation” is |
Make sure “ASP.NET 4.6” is selected as shown below. |
|---|---|
 |
 |
Installation Package
In order to obtain the newest installation file, please contact your reseller, channel manager, or support.
The following is a condensed Installation Guide. For a full installation guide, see the following:
Running the Installation Package
Once your server fits the specifications and prerequisites, run the Installation Package to install all PSIcapture Fusion program files. Note: If User Account Control (UAC) is enabled on your server, you may see several prompts to confirm installation actions (see Figure 1). Your server's security settings may also require you to select the Installation Package, right click, and choose  to run the installation package with full permissions.
PSIcapture Fusion Installer
Next, the PSIcapture Fusion 3 program files are ready to be copied to the system. These include the core product libraries, the default web site deployment files, and other configuration files.
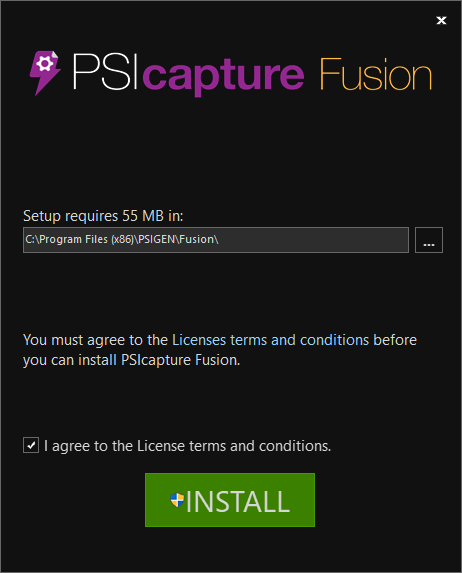
The option to Install will only appear once the License Terms and Conditions have been agreed to by marking the checkbox which indicates that you agree to the terms
(see Figure 2). The default installation path is C:\Program Files (x86)\PSIGEN\Fusion – you may change this path if you wish, though this is usually not necessary. Once the install path is set and the terms are agreed, click the Install button to begin.
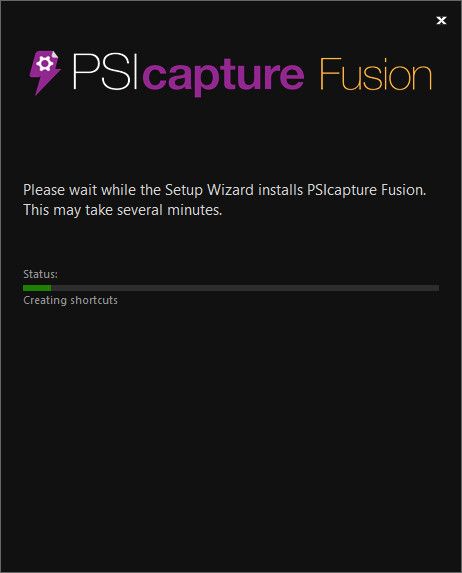
After this, the program files will begin copying, and a progress bar will display the current status (see Figure 3). Shortly after, if all program files were successfully
unpackaged and installed, then the installer will report that it was successful (see Figure 4). Click the Finish button to close the installer; the installation is now complete.
|
|
|
| Figure 2: Install button appears once license terms are agreed to. Installation path appears above and can be modified if necessary. | Figure 3: Installation proceeds Automatically. |
Post Installation
As mentioned earlier, once installation is complete, the Installation Package can be archived or deleted as necessary.
A detailed, technical log of any actions performed by the installer can be found at C:\ProgramData\PSIGEN\Fusion\Setup\InstallLog.txt. This log also includes details on any errors that may have occurred.
Upgrading Your PSIcapture Fusion License
In your PSIfusion 2 installation the web files were located in the “Web” file folder. PSIcapture Fusion 3 stores the files in a new folder called “App.” In order for the “App” folder to
be correctly place the user will need to update their PSIcapture Fusion license.
Open the Deployment Manager
Proceed through all steps in the PSIcapture Fusion Administrator Guide: Creating a New Deployment.
Updating Physical Path for IIS Site
Since the file folder the web files are stored in has changed from “Web” to “App” we will need to redirect the IIS physical path to the “App” folder.
Opening IIS
Find the Internet Information Service (IIS) Manager under Start > Windows Administrative Tools > Internet Information Services (IIS) Manager.

Select your IIS site under Sites > PSIcapture Fusion – Deployment Name.

Select “Basic Settings…” from the menu are the right side.

Select the “…” ellipses button next to the Physical Path text box.

Browse to the “App” folder (Local Disk (C:) > ProgramData > PSIGEN > Fusion > Deployments > Deployment Name > App)

Select the “App” folder and click “Ok”. Once back at the Edit Site window click “Ok” again to save.
PSIcapture Fusion Configuration Changes
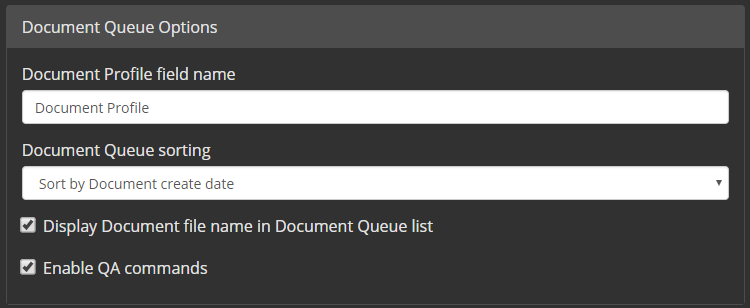
In order to ensure PSIcapture Fusion 3 can see Document Types configured in PSIcapture Fusion 2 there is a setting that needs to be updated.
Under Administration->Configuration the user needs to ensure that the Document Profile field name displays as “Document Profile”.
Comments
Please sign in to leave a comment.