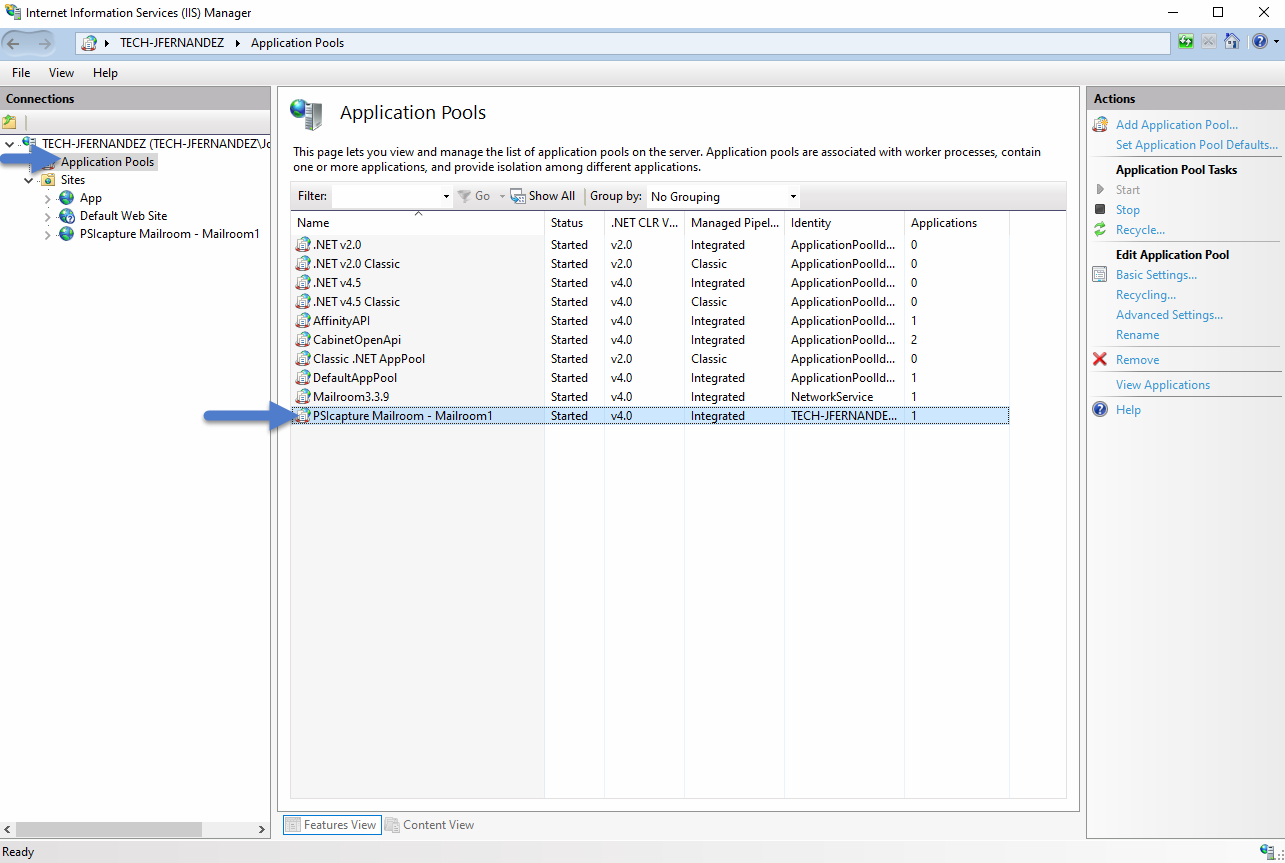
Configure IIS and Verify Settings
Open IIS (Internet Information Services) and check the default Application Pool (Mailroom3.3.9) and Website (App) set by the PSIcapture Mailroom installation process.
Under “Basic Settings” verify the credentials used for the site are valid using the “Test Settings” button, and change credentials if necessary via “Connect As...”
IMPORTANT: Keep in mind you may need to add Read/Write Application Pool permissions:
IIS AppPool\PSIcapture Mailroom - [Deployment Name]
to the Deployment Location, the Installation Location, and the associated Registry Entries in a restricted environment. This can be done by modifying the Security settings within the properties of the above folder locations, which are by default:
C:\Program Files (x86)\PSIGEN\Fusion

C:\Program Files (x86)\PSIGEN\Fusion Service

C:\ProgramData\PSIGEN\Fusion

C:\ProgramData\PSIGEN\Fusion Service

Bindings
- Binding PSIcapture Mailroom to a 443 Port and corresponding SSL Certificate allows the site to be
converted to HTTPS. - A detailed, technical log of any actions performed by the installer can be found at C:\ProgramData\PSIGEN\Fusion\Setup\InstallLog.txt. This log also includes details on any errors that may have occurred.
- Once configured, you should be able to Browse to the Site and pull up the default login screen in the next step.
- If you encounter errors displaying the webpage, ensure that your environment does not prevent browsing to the local localhost:8080 site (default) or that the associated ports are not blocked in any way by firewalls or AV modules.
At this point, you've configured your IIS Web Server, set up your SQL Server, and have installed PSIcapture Fusion, but now you're ready to begin configuring your environment.
This includes but is not limited to:
- Configuring your Organization, which will represent the root of your PSIcapture Fusion configuration
- Adding or importing Users who will work in the system, or connecting to an external User Directory (such as Active Directory) to populate PSIcapture Fusion with
- Organizing these Users into Teams or User Groups, each with their own cascading permission settings
- Creating or importing your Document Types and setting their Permissions Policies
- Connecting to external data sources for lookup or list queries
- Managing administrative tasks such as session and queue monitoring, batch storage, and password changes
Administrator Account
By default, all areas of the web application are always accessible to the administrator account.
This account is created by the system the first time the site is visited by anyone, and it always holds the highest privileges to view and edit all configurable areas of the system. This cannot be changed.
To log in as the administrator:
- Open a compatible web browser and navigate to http://<your.server.ip>/fusion where <your.server.ip> is the domain name, full computer name, or IP address of your web server.
- Once the PSIcapture Fusion Landing Screen appears, the administrator account and default system settings have been created in the background by the system. Click the login button at the top-right of the screen.
-
Once the PSIcapture Fusion Login Screen appears, enter the default administrator account credentials:
User Name: Administrator Password: Admin-01 -
Click OK or press Enter to log in.
User Name is not case-sensitive, while Password is case-sensitive.
- The "Authenticating" progress bar will appear while the system confirms the login; note that this may take some time over a slow network or VPN.
If the Invalid user name or password warning appears, check your spelling and try again. If you believe you have been locked out of your administrator account, please follow the instructions for re-initializing the database.
Change Password
Once the login is authenticated, the PSIcapture Fusion Workspace will appear, and it will be empty provided you do not have any items loaded into your Queue Folder.
It is strongly suggested that you change the administrator account password at this time.
Only the Administrator account or user accounts with the Administrator Role can set or reset passwords.
If you lose access to the Administrator account and have not enabled any other users to have the Administrator Role, you will lose administrative access to PSIcapture Fusion.
To change the Administrator password:
- Click the Administration button
- Navigate to Users > Accounts
- Set the Filter by: to User Directory, and select the System Directory (if these are not already selected)
- Select System Administrator (Administrator) from the list, and click Edit.
-
In the Password field, enter a password and preserve it somewhere safe.
IMPORTANT
The System Directory Password Complexity settings, which are enabled by default, require all user passwords to have:
- One uppercase character
- One lowercase character
- One number
- And must be at least 6 characters in length.
Though you may disable this setting, we strongly suggest that you keep a sufficiently complex password for the Administrator account.
Do not allow an unauthorized user access to your Administrator account by leaving the password at its default value or creating an easily-guessed password, such as your birth date, the name of a familiar object, or the word "password." - Re-enter this password into the Repeat Password field, and click OK. The system will alert you if you have not set a sufficiently complex password.
Comments
Article is closed for comments.