| version 7.9.x | Download Pending |
Note
This article includes advanced Administrator areas for PSIcapture as well as Xero's Web Portal.
Audience
This article is meant for PSIcapture Administrators.
Overview
The Connections tab of the Configuration root menu acts as a global list for Xero Migration connections that can be accessed by all PSIcapture profiles with a Xero Migration in their workflow. During the Xero Migration configuration, the connections configured on this screen will become available in a connection dropdown menu. For more information on configuring a Xero Migration workflow step, see:
PSIcapture Administrator Guide: Xero Migration Configuration
Xero Account and Application
Before proceeding, Administrators must ensure that their Xero account is created and configured with a PSIcapture App. For more information, see:
PSIcapture Administrator Guide: Connecting PSIcapture to Xero
Creating a Xero Connection in PSIcapture
In order to authenticate to Xero, you must add a connection using the new Connections module on the PSIcapture Configuration screen:

PSIcapture's Connection tab, within the Configuration root menu, is designed specifically to host universally accessible connections for the Xero migration. The connections must be hosted at the root menu to allow any capture profile to access the Xero API and perform lookups and migrations.
Add, Edit, and Delete
Use the Add, Edit and Delete buttons to maintain your list of connections. These functions perform as expected, allowing users to add or edit a Xero connection, or permanently delete one.
The Details button will display a message box with various information concerning the highlighted connection.
The Usage button will display the standard PSIcapture Usage dialog seen in other areas (Storage, etc.). Use this dialog to determine which Capture Profiles are using the highlighted connection. If you have multiple connections defined, you can also use the dialog to switch the settings from the selected connection to another across all listed profiles.
NOTE: Prior to adding or re-authorizing a connection, it is advisable to log into Xero account using your default web browser to ensure your login is current and any 2FA prompts are accepted. The login can often be a bit lengthy, so logging in prior to working with a connection in PSIcapture will prevent timeouts from occurring.
To create a new Xero connection, press the Add button. This will display the Connection Definition screen:
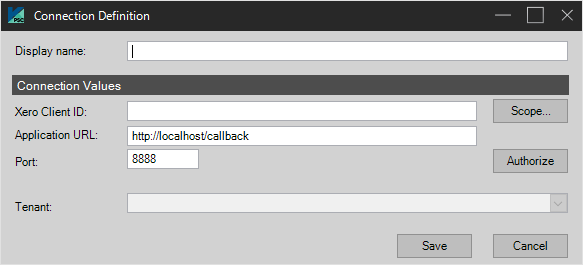
Connection Definition
- Set the display name to a whatever you choose to identify this connection.
- The Xero Client ID is the ID you captured earlier when configuring PSIcapture on the Xero web site.
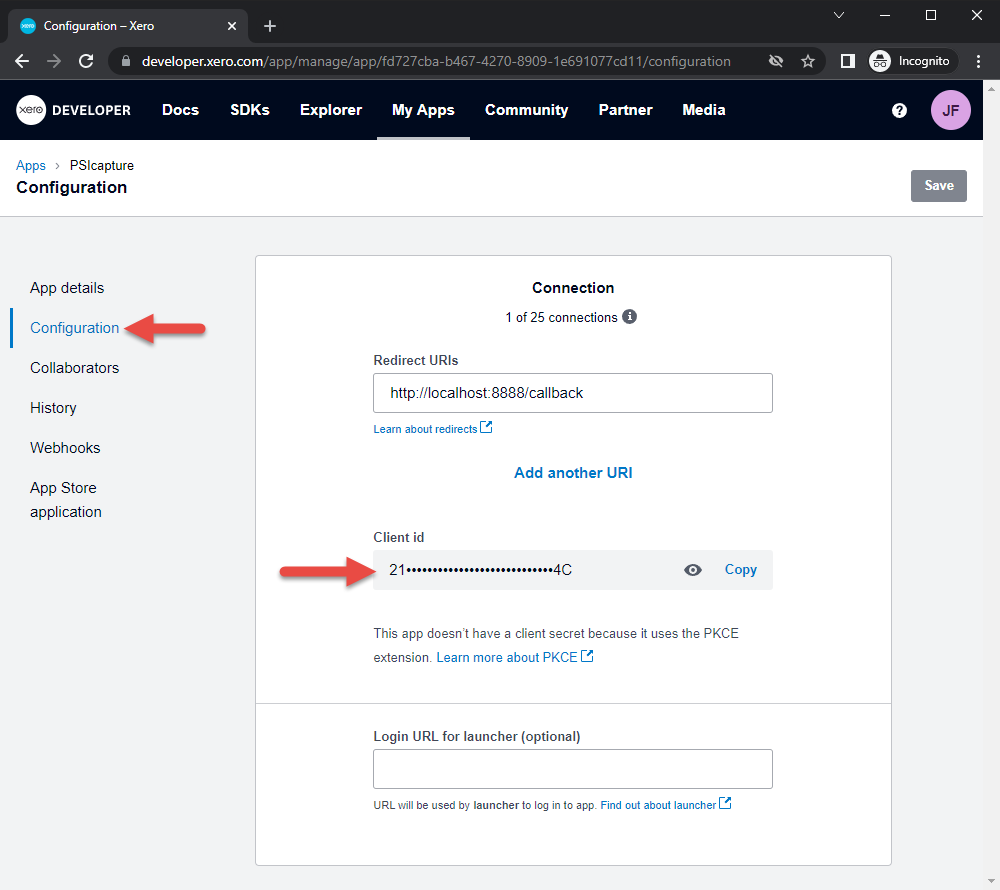
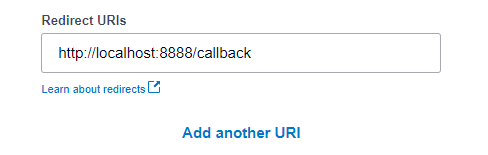
NOTE: The Xero Development website is: https://developer.xero.com/ - The application URL & port should match the “Redirect URL” specified when configuring PSIcapture on the Xero web site:
- Press the Authorize button. Your default web browser will open.
- In the screen provided in the web browser, press the Allow Access button to approve the connection.
- After a few seconds you will see the access information, and PSIcapture will display a message box reporting a successful connection.

NOTE: PSIcapture may be hidden by the browser window. Also, do not close the web browser until the message box is displayed. The maximum wait time is 90 seconds before the attempt will time out.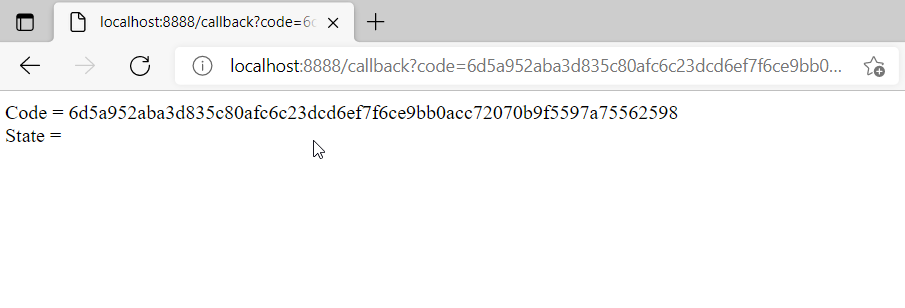
- Close the above pictured web browser window.
- Once authorized, the Tenant drop-down will display a list of companies. Select the appropriate company and press the Save button.
- You now have a connection which can be used in other areas of PSIcapture.
NOTE: If you receive “invalid grant” issues for a connection, Edit the connection and press the Authorize button to re-authorize the grant.
Comments
Please sign in to leave a comment.