Overview
The following installation guide is intended for PSIsafe Administrators, Internal/External IT Technicians, or authorized personnel at your organization who can install applications. This user will need administrator access to both the Server machine(s) as well as the End-user workstations.
Prepare New Server
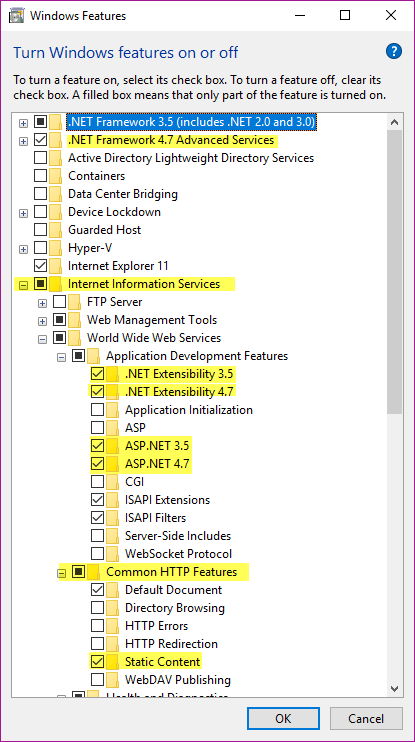
Prerequisites - Windows FeaturesFor a fully-detailed guide on installing PSIsafe Server Prerequisites, see the PSIsafe Server Prerequisites Guide. Ensure the following features are enabled:
System RequirementsEnsure the machine meets the minimum requirements in the above link, and you’ve downloaded:
|
|
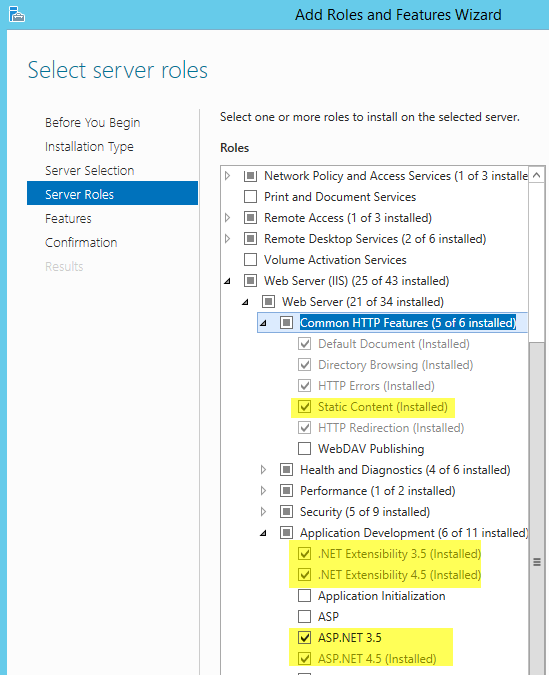
Prerequisites - Windows Server FeaturesFor a fully-detailed guide on installing PSIsafe Server Prerequisites, see the PSIsafe Server Prerequisites Guide. Ensure the following features are enabled:
|
 |
Unblock Installers & Run as Administrator
|
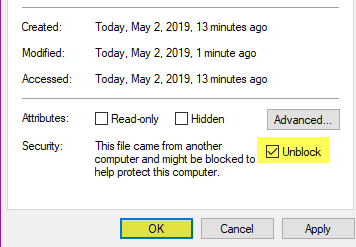
Ensure you unblock all installers. Right-click on the downloaded installer and Selete Properties. On the bottom-right of the Properties Window, hit Unblock. Then, hit OK. Once the installer is unblocked, right click and “Run as Administrator” when completing the following installation guide. |
|
 |
Port Exceptions
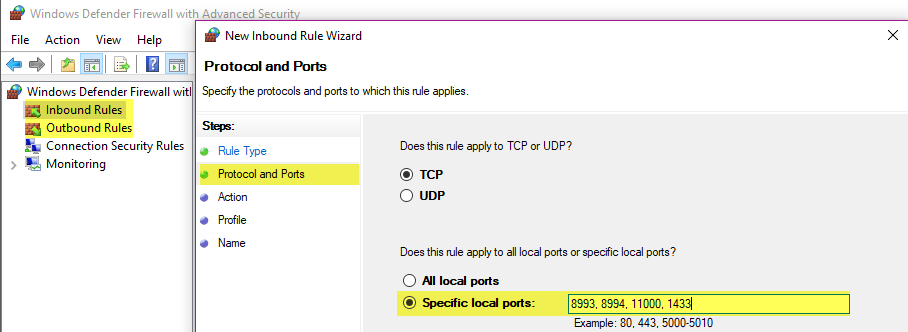
PSIsafe uses the following ports:
(Add Inbound and Outbound entries)
| TCP/IP | UDP |
|
|
Install New SQL Instance
Condensed SQL Installation Guide:
Install SQL Server Express on New Server
- Download the latest SQL compatible with PSIsafe via the Microsoft SQL Download portal:
Microsoft SQL Server Download Page
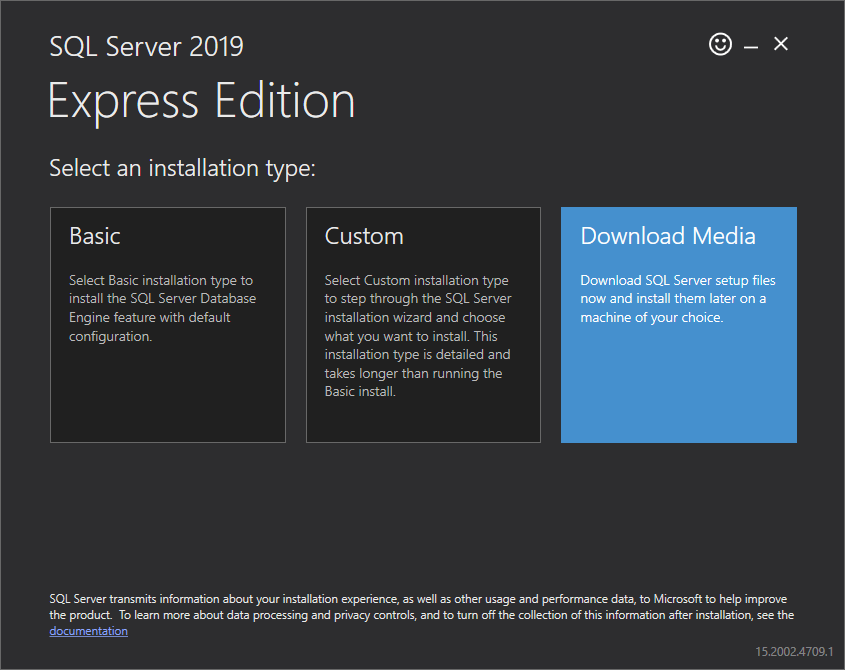
(Select SQL Express or SQL Standard depending on your installation type and purchased licensing.) - Unblock the downloaded installer, Run as Administrator, and Click "Download Media" on the resulting GUI for the SQL Server Installer:
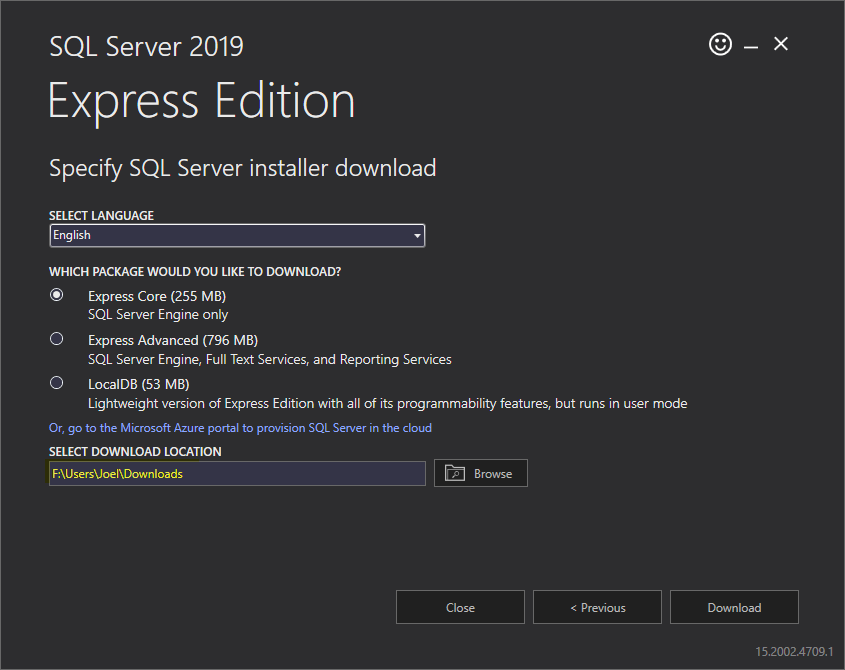
- This will download the SQL Server Installation Center to the specified location:
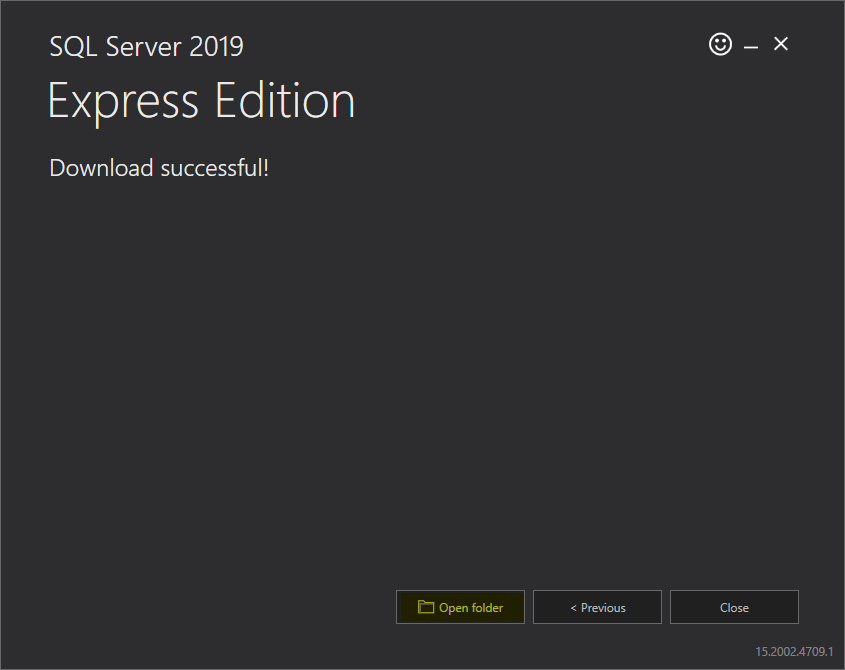
- Click "Download" and then open the download location via the installer or manually browse there in Windows Explorer once the download is complete:
-
Run the downloaded executable after being sure to unblock and “Run as Administrator”.
-
Most of the default selections for the installation will be appropriate, allowing you to select “Next”, with the exception of the following screens:
-
Check the box for “Use Microsoft Updates to check for updates (recommended)”.
-
Name your SQL Server Instance to PSIsafe or similar on the “Instance Configuration” page.

-
Set the SQL Server Browser to “Automatic” startup type on the “Server Configuration” page.

-
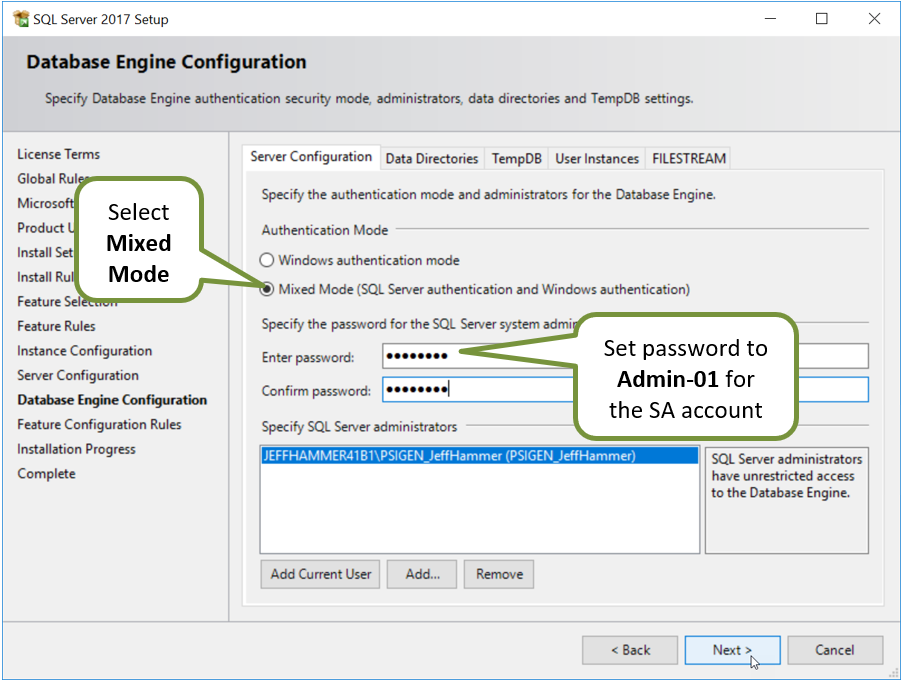
Set the Authentication mode to “Mixed Mode (SQL Server authentication and Windows Authentication)”.
-
Set the “sa” user password to “Admin-01” or something you will remember for later in the installation and registration process.
-
Finish the installation process (may take some time) until you arrive at the “Complete” screen.
SQL Server Management Studio (SSMS)
-
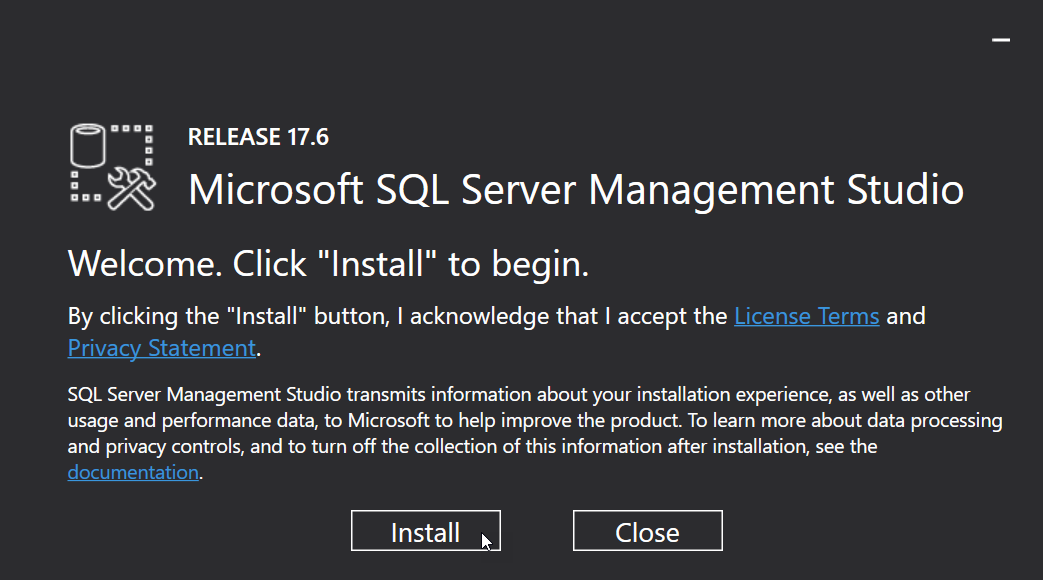
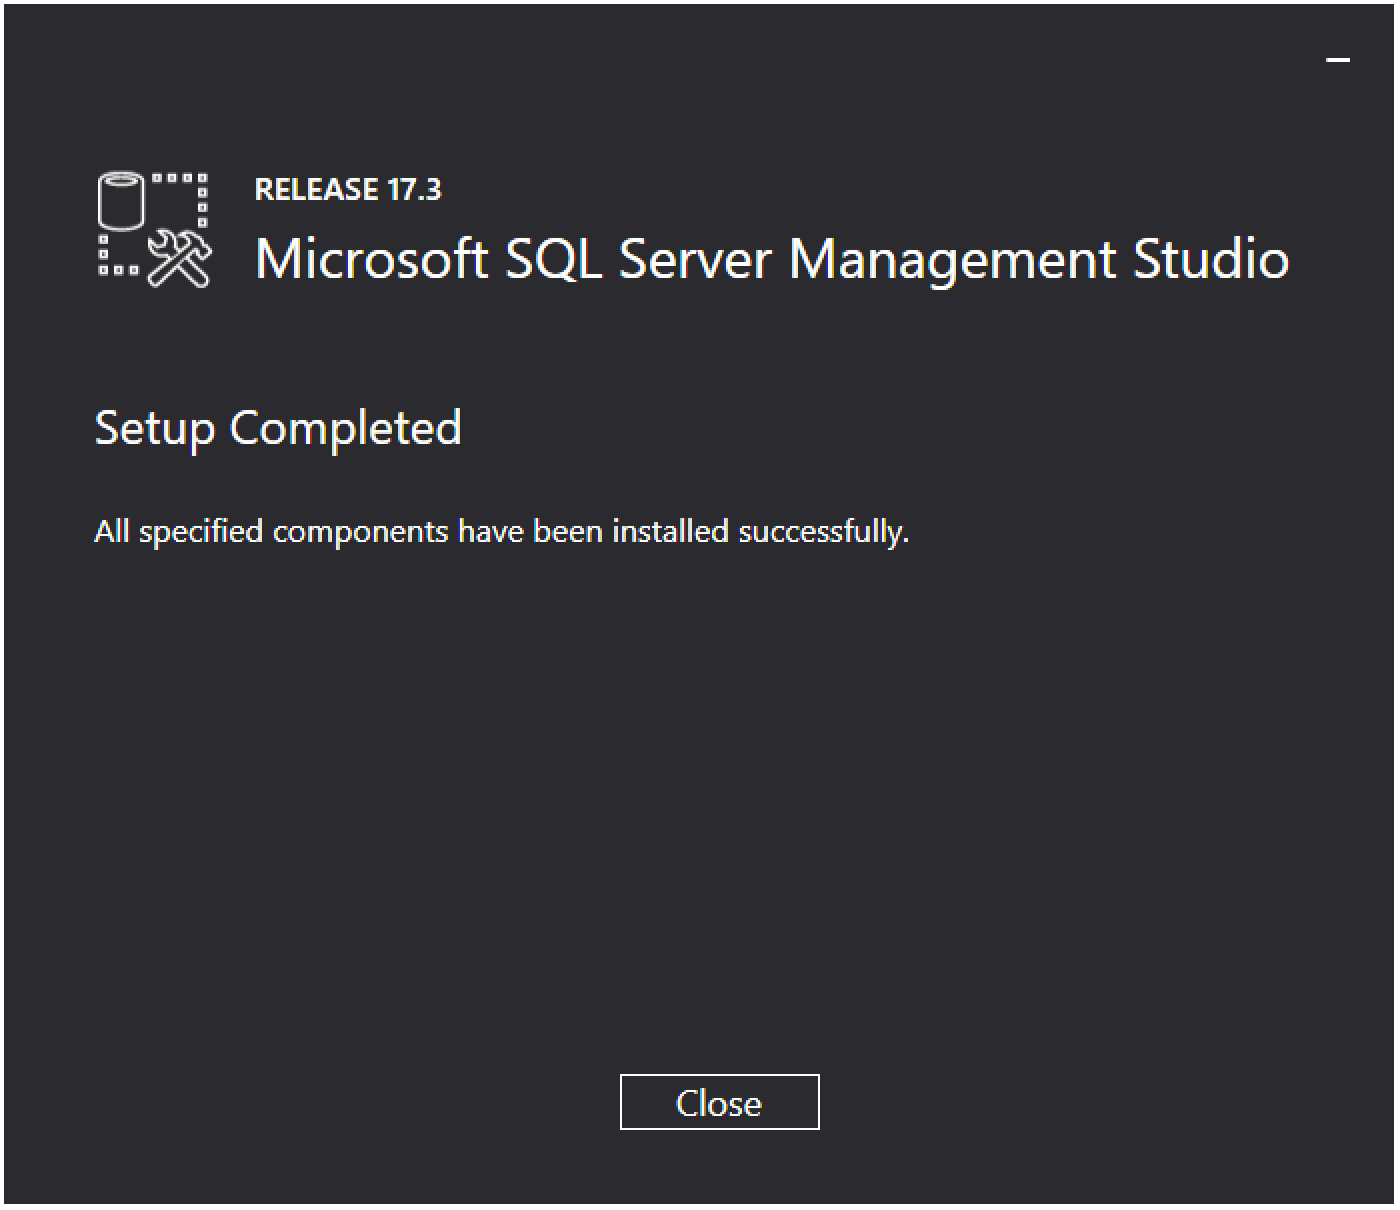
Run the downloaded executable after being sure to unblock and “Run as Administrator”.
-
Click "Install" and complete the installation until you see the “Setup complete” window.
Initial SQL Configuration
Set TCP/IP to Enabled
-
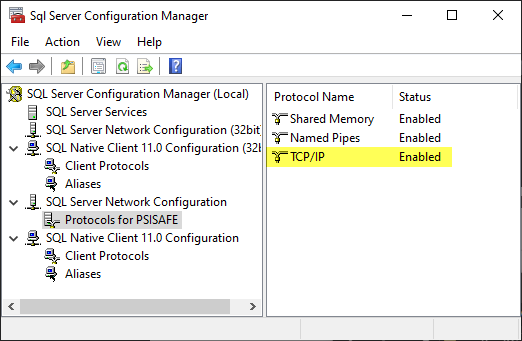
Open the SQL Server 2017 Configuration Manager. (Default Path C:\Windows\SysWOW64\SQLServerManagerXX.msc)
-
Select the Database we just created during the SQL Server Express installation process under
“SQL Server Network Configuration”. -
Highlight “Protocols for [Instance Name]”.
-
Right-click on “TCP/IP” and click “Enable”.
-
In some environments and installations, you may need to enable “Named Pipes” as well.
-
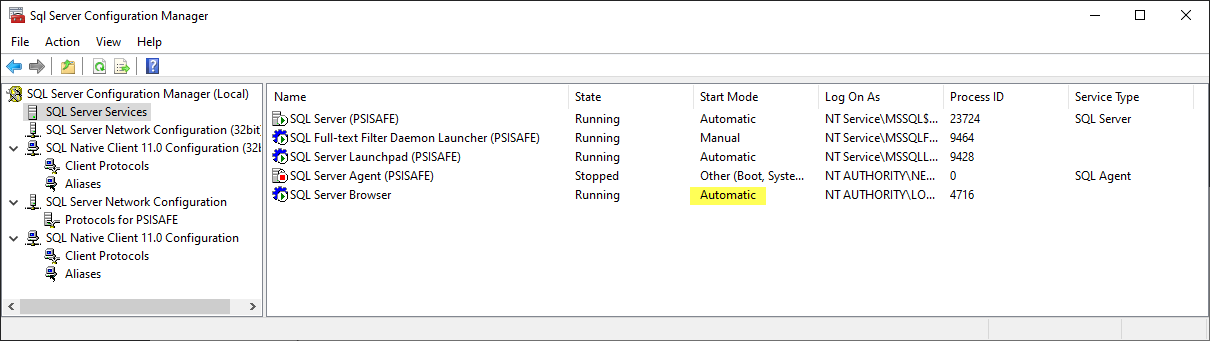
If the process was missed during installation, set the logon type for “SQL Server Browser” under the SQL Server Services tab to “Automatic”.
PSIsafe Server Installation
|
|
 |
PSIsafe Database Setup

Click "Next" on the PSIsafe Database Setup screen when it appears towards the end of the installation.
On the PSIsafe Database Setup screen two, enter your SQL Server Location relative to the machine on which you are installing PSIsafe Server. For New Installations, make sure the box for "Skip SQL Database Creation" is unchecked. This will ensure that a database with your specified database name will be created and associated with your PSIsafe Server:
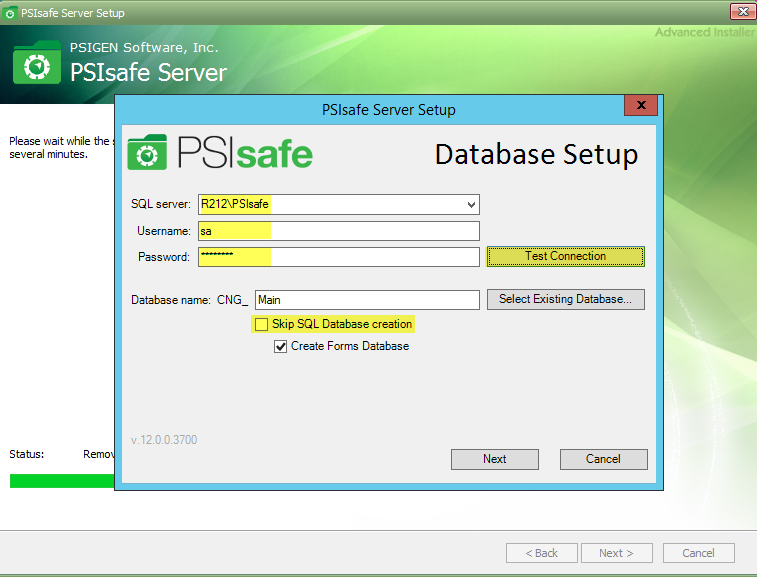
Hit the "Test Connection" button to ensure that your PSIsafe Server installation can make a valid connection to your SQL Server Instance. Finally, when complete, click the "Next" button to complete the Database Setup.
Install PSIsafe Client
Once your Server Installation is complete, move on to installing the PSIsafe Client. For a full detailed guide on installing the PSIsafe Client, see this link.
Registration
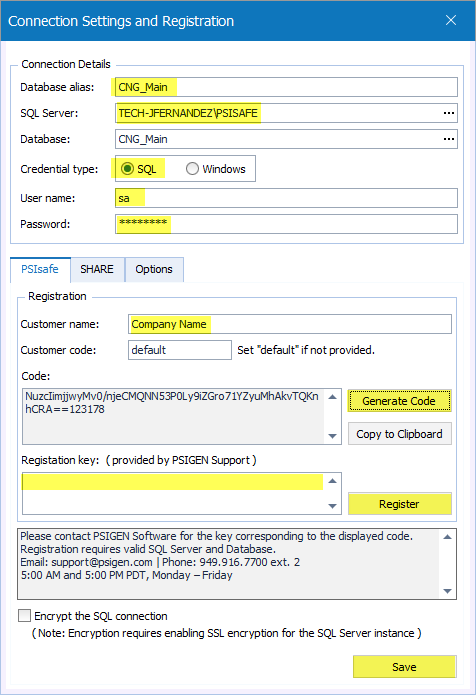
For a full Registration guide, see the PSIsafe Server Administrator Guide: Registration.
|
|
 |
Comments
Article is closed for comments.